style="display:inline-block;width:728px;height:90px"
data-ad-client="ca-pub-7884394583352547"
data-ad-slot="7213558510">

Thursday, 5 September 2013

Sea Shell Fairy Houses

In our last blog post you may remember 'Fleur' our fairy had brought us back some trinkets from her holiday in Atlantis.  We decided yesterday to clean up around our fairy door because it didn't look like 'Fleur' was going to do it any time soon ;)

The kids loved all the shells and we didn't want to just throw them out, Molly came up with a fairy fantastic idea! She wanted to make a shell city. Little houses made out of the shells. Fairy sized shell houses for our garden fairy's. What an adorable idea!!! 

This was such a fun thing to do and it really was so much fun. We used markers to draw windows and doors on the shells, Molly even drew a winding grand stair case in one of the big shells and a 'Home Sweet Home' picture for the wall (Its too cute). To make the glitter roof tops we placed a little PVA glue on top of the shell, then sprinkled the glitter over the glue and shook off the excess. Molly made the floors inside the bigger shells glitter too.

Once she was happy with how they'd turned out she skipped out to the garden to make and arrange her shell city.  When it was a done she brought me outside to see it. 


There it was nestled among the clovers and the long grass 'Shell City' Beyond adorable! 

She was so cute all afternoon she kept saying I think I seen a fairy fly over shell city mum!

Looks like a fairy did come to stay in one of our fairy shell houses last night! One of the shell houses was open held up with a piece of wood, inside was a bed of moss and some fairy dust!!!  WOW..... ;), 


Tis without a doubt the littlest things in life,

Such fun and excitement, imaginations running wild!

We love the magic of the fairy's do you?

xXx

Www.mudpiesandrainbows.com


Tuesday, 13 August 2013

Fairy Vacation.......

I'm thinking I might just have to write a letter to our fairy 'Fleur' asking her to kindly tidy up after herself and not be so messy! She's always dropping fairy dust everywhere and last week we woke up to find the tiniest white unicorn horse hooves trailed across my kitchen floor!

This morning how ever took the biscuit! Apparently 'Fleur' has been away in 'Atlantis' of all places on holidays. She had such a fantastic time she wanted to bring a piece of Atlantis home! 

Really 'Fleur' the entire beach!


The kids were so excited!!! Fairy sized sandcastles, sea glass and tiny seashells.
She brought two 'Shell Phones' back for the kids Its too funny they've been listening to the sounds of the sea and hoping a passing mermaid might answer! Inside a tiny half opened muscle shell we found a pink pearl!

The kids were so intrigued by the tiny fairy foot prints in the sand.

In 'Fleurs' letter she explained to the kids that the mermaids that live in Atlantis collect beautiful sea shells and make the most amazing jewelry from them.  So we decided to have a go at making our own necklaces out of the sea shells 'Fleur' had brought us back from Atlantis.

So easy to do and so much fun!

All you need is some thin bendy wire, some string, some seashells and sea glass, and a glue gun.

Twist a small piece of bendy wire to make a 'P' shape, the circle part of the 'P' is where your string will go through. Apply a little glue to the top back part of the shell, then quickly place the straight part of the bendy wire into the hot glue. Hold it for a minute until the glue cools And dries. So simple and easy to do!

Here's how one of ours turned out..... We added a little green sea glass to our shell necklace.


Such a fun day, next time you're at the beach keep an eye out for some pretty seashells and have a go at making your own unique 'Atlantis Accessories' ;), 


Sparkle Bright,

The Fairies xXx

Www.mudpiesandrainbows.com


Tuesday, 9 July 2013

Airy Fairy Air Dry Clay...'Toadstools'

Schools out for Summer YEA!

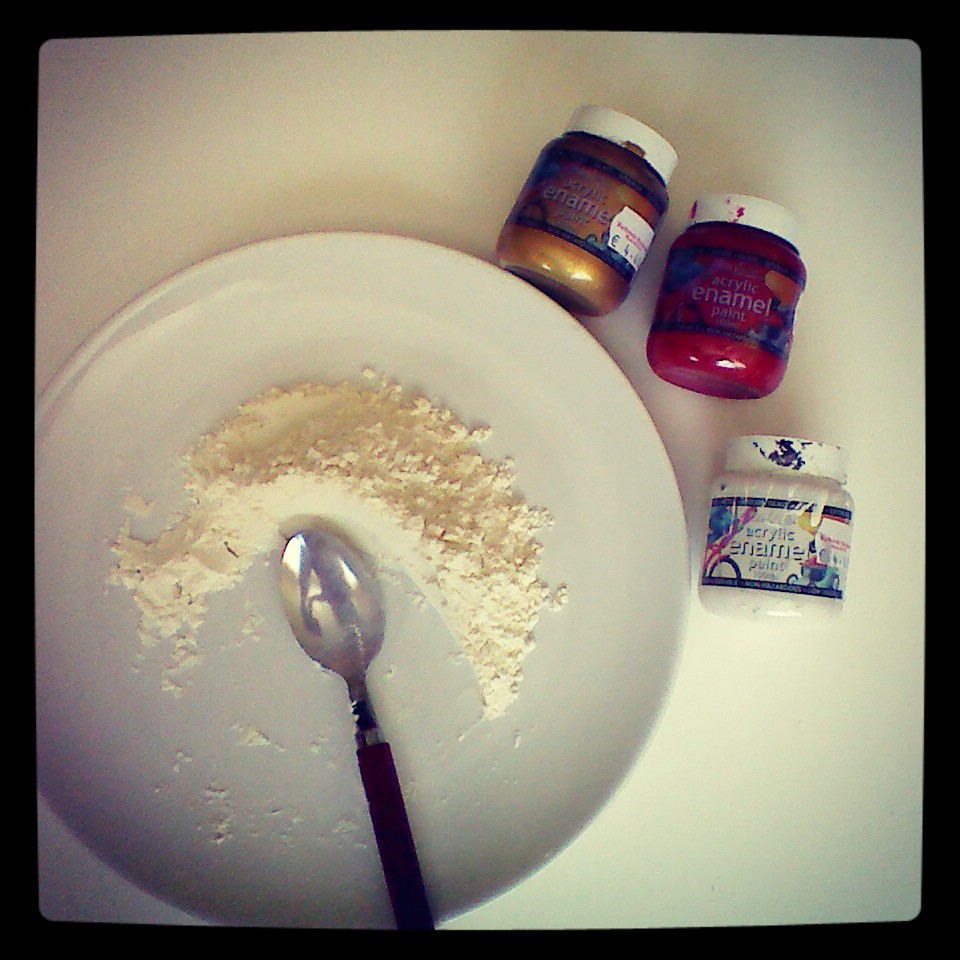
This week I decided to make some Air Dry Clay with the kids we tried our hand at making some Fairy Sized Toadstools! 

So easy and so much fun to make.

All you need is:

- Plain Flour
- Acrylic Paint (White & Red)
- One Cotton ear bud
- Some Super Glue


Take about a tablespoon full of flour, place it in the palm of your hand, dribble some red paint into the flour and squeeze it and stretch it. Keep adding paint until you get a 'red play dough' consistency. Then mold it into what ever shape you want your toadstool to be. Place on a window ledge to dry. Wash the red paint off your hands ;) take about a half a tablespoon of flour in the palm of your hand pour a little of the white paint into the flour, squish and squeeze it until it reaches the consistency of 'white play dough'. Roll the dough into a small sausage shape.  Flatten both ends so it will stand by itself and so that the top half of the toadstool can be glued on top.


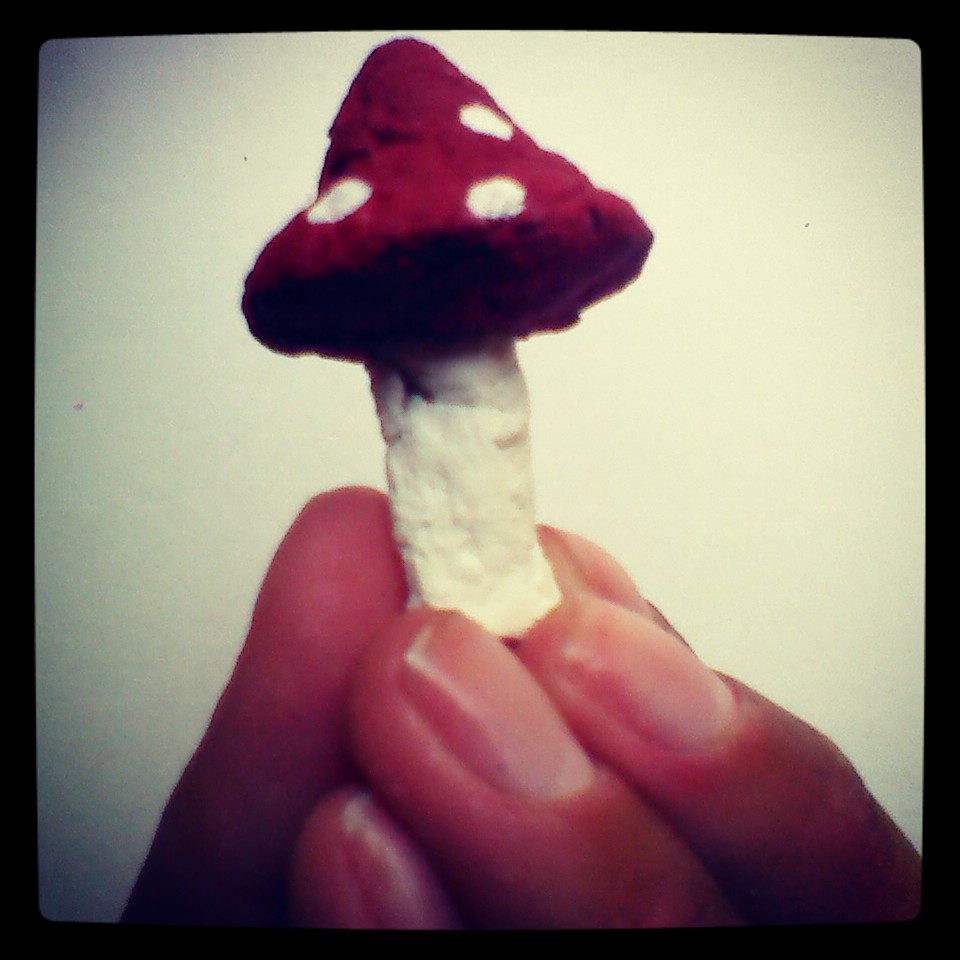
Leave them to dry over night, once they are dry use a little of the white paint along with the tip of the cotton ear bud to paint the little round white dots on to the toadstool. Once the dots are dry super glue the white stem to the bottom on the toadstool. Then place it outside your fairy door for the fairy's to find ;),

Here's how ours turned out....


So Stink in Cuteness!


Here's the beautiful Toadstool and Fairy Basket my beautiful Niece Molly made for outside her fairy door.... I just adore them they are so beyond cute!


We've been keeping an eye out hoping to catch a glimpse of a fairy perched on our little toadstool.... No sightings as yet! ;)),

Sparkle Bright,

The Fairies xXx

Www.mudpiesandrainbows.com

Wednesday, 26 June 2013

DIY 'Fairy House'

One of our favourite things to do is make little fairy forts in our garden for any visiting fairy's. We usually make them out of leaves, twigs, flower petals or any bits n bobs we can find hanging around or growing in our garden. They always turn out so fantastic, most of the time they get blown away or walked on by our dog!  So yesterday we decided to make a more stable Fairy House for our garden.

Here's what we used to make ours:


- 1 x Small Box/or an empty Milk Carton
- Some Paper
- Glue
- String
- Scissors
- Decorations - Stickers, Flowers, Glitter etc...

Here's how we made it:

We decided on what type of house we wanted to make, I wanted to make a town house with little windows and a front door but the kids wanted to make it like a bird house! So a bird house style Fairy house it was :),


We covered the empty box with paper using a little glue. We cut out a circular hole for the front door. I had some wooden roof tiles left over from a custom Fairy Window I made for a customer a while back, so we used them for our Fairy House Roof. You could just as easily draw and colour the roof tiles on a piece of paper then stick them to the top of the carton.   To decorate the Fairy House we stuck on some fairy stickers and made a Fairy sized door sign that said "The Fairy's Summer House, All Fairy's Welcome". Lastly we punched a hole in the very top of the carton, popped through some string so that we could hang it up somewhere safe among our trees.


We found the perfect sheltered place to hang our 'Fairy House' and spent most of the evening peeking out the back door window hoping to catch sight of a visiting Fairy Friend..... Oh the magic of the fairy's I truly love it!

 
Our Completed 'Fairy House'


Such a wonderful afternoon spent with the kids making memories and dusting our house and garden with a little Fairy magic.......
 
We would love to see your fairy summer house that you make for your garden. You can send us your pictures via our facebook page or by emailing them to info@mudpiesandrainbows.com
 
Enjoy the Magic,
 
Sparkle Bright,
 
The Fairies x


Wednesday, 19 June 2013

Pixie Perfume...... a Fairy Fragrance!

Hi,

A very retro vibe to this weeks blog post. Where I live during the winter months the greens and streets are empty, Now summer has arrived and the sun is shining my gosh the streets and greens around our estate are filled with kids playing. It is beyond lovely to see them out playing and not sitting in front of the TV or with a video game in hand. It got me thinking about my childhood and all the fun things we got up to during Summer.

One of my favorite things to do as a kid was make home made perfume! So I figured I'd make some and leave it outside our fairy door for the kids to find!

My neighbors what must they think of me out picking buttercups LOL ;),

So simple to do I used an empty mini jar of jam. Picked a couple of buttercups some lavender and used a little double sided sticky tape.

I covered the lid in double sided sticky tape, popped the heads off about twenty buttercups and stuck them to the lid making sure there were no gaps. I sprinkled a few pinches of lavender flowers into the jar and filled it with warm water and gave it a mix. I also put a pinch of dried cornflowers leaves in to and it turned the water blue. It smelled so nice ...... Carefully I screwed the lid back on the jar and positioned it outside the door.


I ahem.... I mean 'Fleur' our Fairy left a letter in the mailbox .......... ;),


So excited for the kids to come home from school today and find it! They are going to love it. I'm sure we will have a go at making a  bottle of our own 'Pixie Perfume'

Tis truly the little things that make the most magical memories and are the most fun to make and do.

Hope you have fun making your 'Fairy Fragrance'

Enjoy the magic!

Sparkle Bright,

The Fairies xXx

Www.mudpiesandrainbows.com


Friday, 7 June 2013

Fairy Flower Mandala

Summer has finally arrived here in Dublin Ireland ;), It's been blue skies and sunshine all week from sun up till sundown. So it was only fitting that I would incorporate Summer into this weeks blog post.  

Those of you who follow my blog regularly will know that 'Fleur' our house fairy is a nature fairy and she has gone back to fairyland for the summer ;), she has been popping back from time to time to collect/reply to her fairy mail and/or to leave trinkets from fairyland for the kids before flitting back to fairyland ;),

The fine weather has my garden bursting with daisy's and buttercups and it gave me the inspiration for this weeks blog post!

I picked a few Daisy's,  Buttercups, Flower petals and leaves and headed up to our fairy door to make a 'Fairy Flower Mandala' Here's how it turned out!


'Fleur' left the kids a letter explaining that this was a 'Fairy Flower Mandala' that they make them in all shapes, and sizes in fairyland to celebrate the beginning of Summer. They hold Fairy Feis where they dance around the flowers under the moonlight. She asked the kids if they would make a 'Fairy Flower Mandala' in the garden for her and her fairy friends to enjoy ;),


My gosh the kids were so intrigued a little shocked and amazed I think ;), needless to say off we went straight away on a nature walk to collect flowers and petals to make our very own 'Fairy Flower Mandala'. It was so much fun! A great use of creativity and imagination kept them busy for the entire afternoon and they all turned out amazingly! Next time we make them I think I will use PVA glue to stick them to paper and then frame them they are so pretty.

When the kids went to bed I sprinkled a little glitter over the 'Fairy Flower Mandala's' that they had made. They were so happy the next morning to find traces of fairy dust they were so excited that the fairy's did come and dance among their mandala's

I hope this has inspired you to do the same with your fairy door and bring a little extra excitement and magic into your house. A little old fashioned fun spending time outdoors with the kids having fun and making precious memories.

We would love to see pictures of your Fairy Flower Mandala's follow us on Facebook and post us your pictures we'd love to see them.

https://www.facebook.com/mudpies.andrainbows?ref=tn_tnmn

Have fun,

Sparkle Bright,

The Fairies xXx

Www.mudpiesandrainbows.com

Friday, 24 May 2013

Make & Do Fairy Door Signs.....

Everyone knows that the Fairy's are a little shy shall we say! So you'll never see them in the light of the day.  They love to communicate with us through letters and by leaving us fairy sized trinkets and treasures.

Our Fairy Fleur is a nature fairy ;) a few weeks ago she wrote and told the kids that she was off back to Fairyland for the Summer.  The kids have been missing her ........ So this week I decided to make a door sign for our fairy door! 

The possibilities are endless, I made two one that says 'In the Garden' and another one that says 'Away With The Fairy's'.

I hung the 'In The Garden' sign off the door handle and sprinkled a trail of sunflower and pumpkin seeds outside the door! 

It took awhile for the kids to notice but when they did my gosh they were so excited. Convinced That she was in our garden planting seeds they ran outside hoping to find her! So Stink in Cute ;), 

The door signs were so easy to make and took minutes, so worth it!

Here's all you will need to make them:


- Some Card stock Paper
- Markers or Colouring Pencils
- Stickers or Shaped Sprinkles
- Thread
- A sewing needle
- Some PVA glue
- Scissors


Using the card stock paper cut out the size and shape you want you sign to be.  Write your caption on your sign using the markers or the colouring pencils.  Use the needle to pierce two holes in the sign and thread a piece of thread through the holes you just made, tie them together. Decorate your sign with stickers or sparkle shapes and that's it. 


Here's what our signs looked like Hung on our fairy door


So Simple, So easy to fuel the kids imagination and bring lots of magic and excitement into your house.


Check out our Facebook page for a little Competition we are running this week just click on the link below To find out more:


Best of Luck,

Sparkle Bright,

The Fairies x

Www.mudpiesandrainbows.com